Using VSCode and Markdown to Take Meeting Notes
In this brief tutorial, you will learn how to:
- Download VSCode
- Install the MarkDown All In One extension
- Learn the bare essentials about Markdown
- Define a Markdown snippet, and map it to a key sequence
- Use the mapped key sequence to insert minute markers to take organized notes about what speakers are saying at the meeting.
At the bottom of this page you will also find links to a brief video demonstration of how this setup works, as well as links to download template Markdown and MS Word/LibreOffice files.
Download VSCode
Visual Studio Code is a free (of charge) text editor available for all platforms (Windows, MacOS, and Linux). To Download VSCode, please download the installer from their Official Website. You'll see the download button on their main page:

For your convenience, here are some direct links to their website, to downloading installers for all major platforms:
Please follow the installation process, and start VSCode when the installation is done. You will be greeted with a first screen, prompting you to Get Started and personalize your experience. Feel free to customize your installation, or to ignore it by closing the "Welcome" tab.

Install Markdown Extension
Now that we have VSCode installed, we need to install a Markdown extension, which will ensure that our Markdown files are rendered correctly, and provide us the ability to see real-time previews of our files, and other neat capabilities.
The extension we want to install is called Markdown All In One. You can install it by selecting the Extensions pane on the left panel of the window (the one that looks like a few grouped squares at the bottom), and then writing 'markdown' on the search bar.
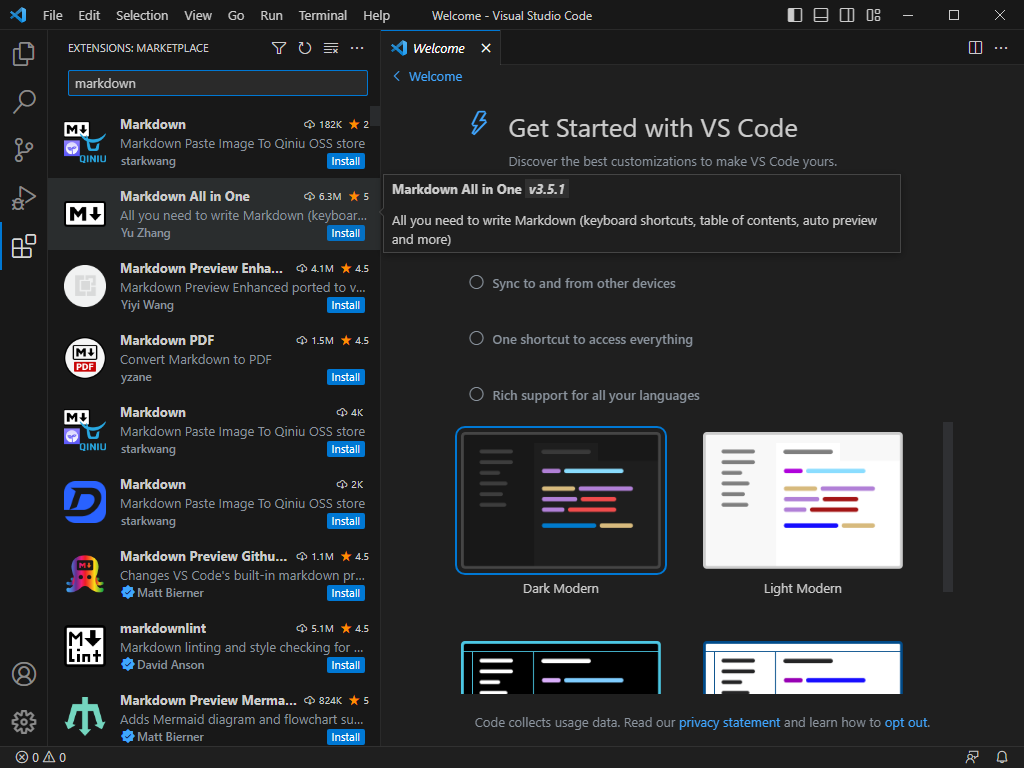
You will notice several results of possible extensions to install, but be sure to install Markdown All in One:
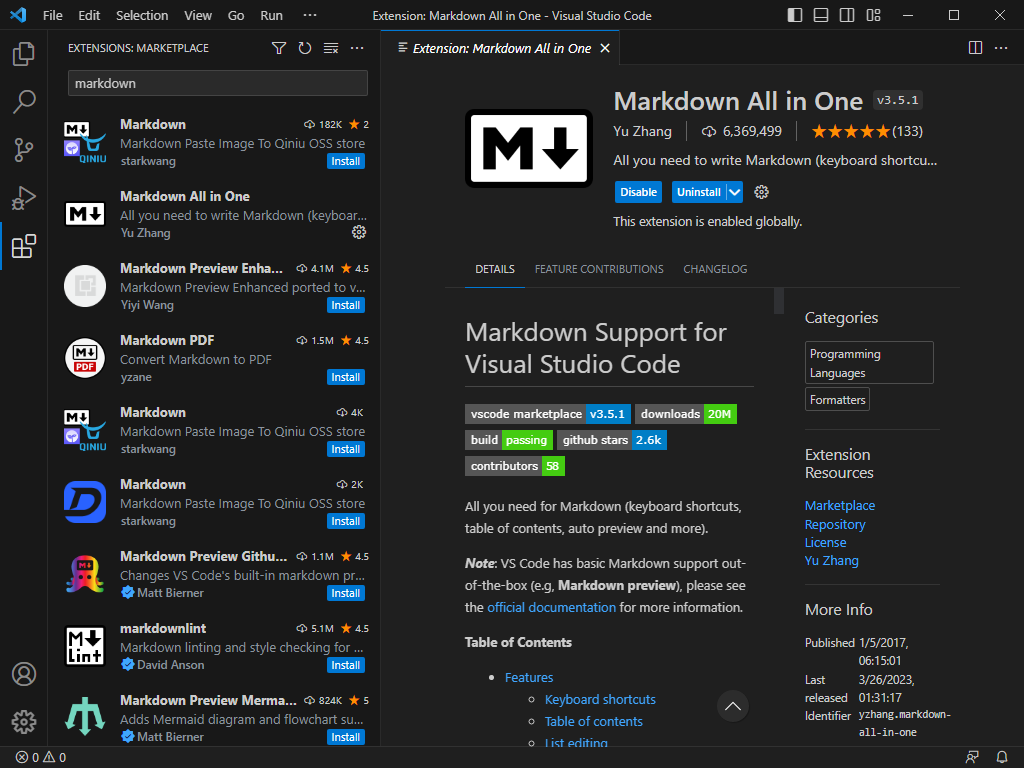
Once you have clicked the blue "Install" button, you will see that the extension is active, by how its information is presented on a new tab.
Markdown
Markdown is a simple yet powerful syntax that can be used to write plain text files in order to format them in an organized way, with headings, lists, tables, and many more features. If you have seen README files found in GitHub repositories, most likely Markdown is the way these nice-looking pages are written.
The most important feature of Markdown files is that, even though their naming convention is to name files with the ".md" extension, is that in the end, Markdown files are just plain-text files. This means we can easily open them, and interact with them, using any type of text editor. For our particular case, we will be using VSCode since we just installed it!
Markdown Essentials
The most basic syntax elements you should know about Markdown are the following:
- Headings
- Headings are defined by starting a line with the '#' symbol
- '#' is a first level heading (the largest)
- '##' is a second level heading
- '###' is a third level heading
- ... and so on
- Headings are defined by starting a line with the '#' symbol
- List Items
- List items are defined by starting a line with either:
- '-' a single dash - which will render an unordered list
- '*' an asterisk - which will also render an unordered list
- '1.' a number 1 followed by a period - which will start an ordered list
- List items are defined by starting a line with either:
- Text format options:
- Italics: italic letters are achieved by surrounding text between single asterisks, or single underscores:
- like *this*, or like _this_
- Bold: bold letters are achieved by surrounding text between double asterisks, or double underscores:
- like **this**, or like __this__
- Notice that there are always two ways to achieve either bold or italic letters; this is intentional, as this enables you to combine the two to create bold-italics:
- like **_this_**, or like __*this*__
- Italics: italic letters are achieved by surrounding text between single asterisks, or single underscores:
- Line breaks:
- Note that introducing two 'space' characters at the end of any line (including headings) will insert a line break at that point in the text!
Example Markdown File
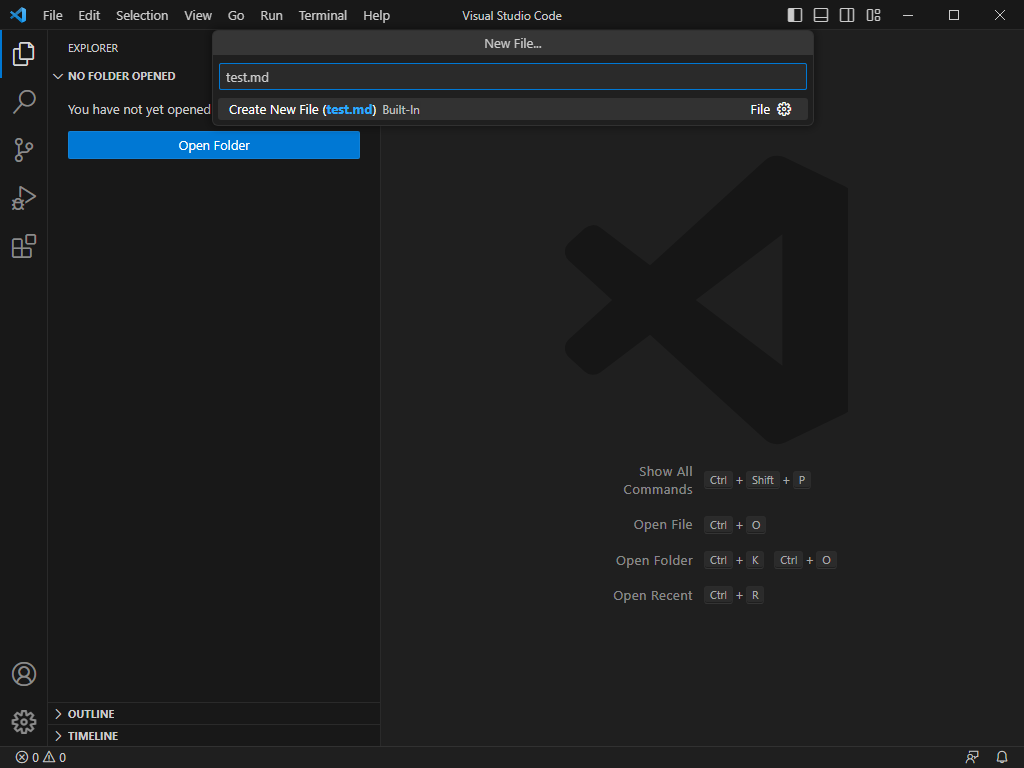
Now that we know the bare minimum essentials about markdown, let's use VSCode to create a sample Markdown file. Use the application's menu to create a new file (or press Crtl+n / Cmd+n to create a new text file):
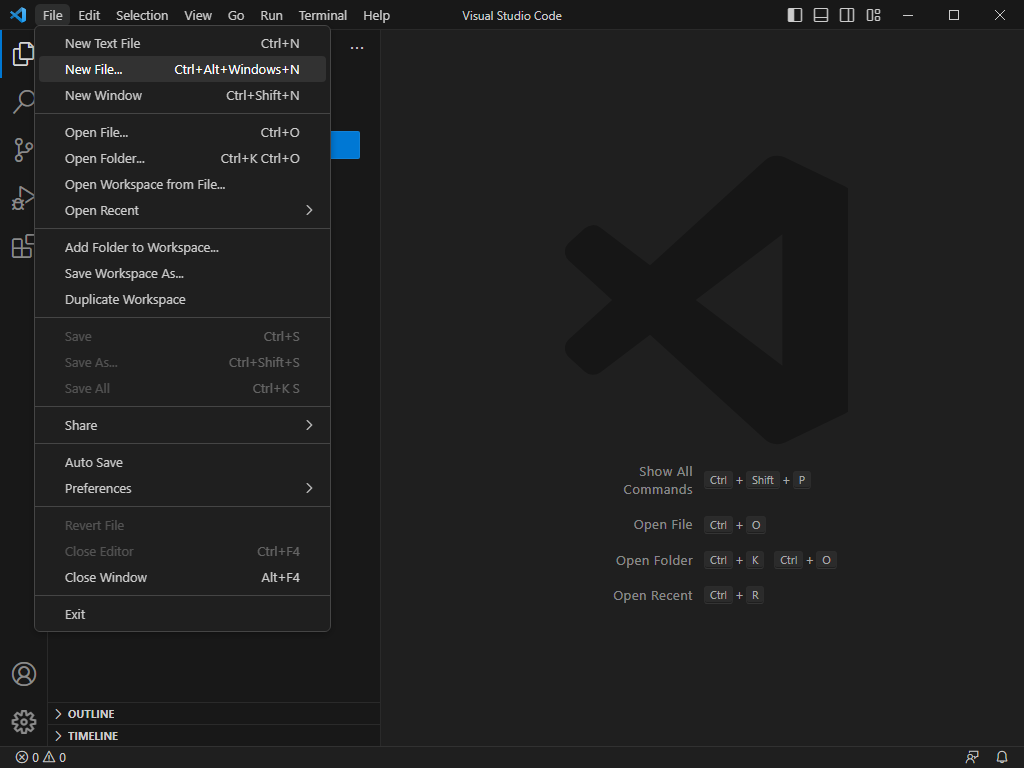
Make sure you save your file with a ".md" extension!
In this sample Markdown file, we can write the following example content:
# This is a first level heading
**This is some bold text:**
- These are unordered
- list items
## This is a second level heading
1. These are
2. ordered list items
### This is a third level heading
* These are
* bullet points too!
You can also download a copy of the Markdown file from this GoogleDrive link.
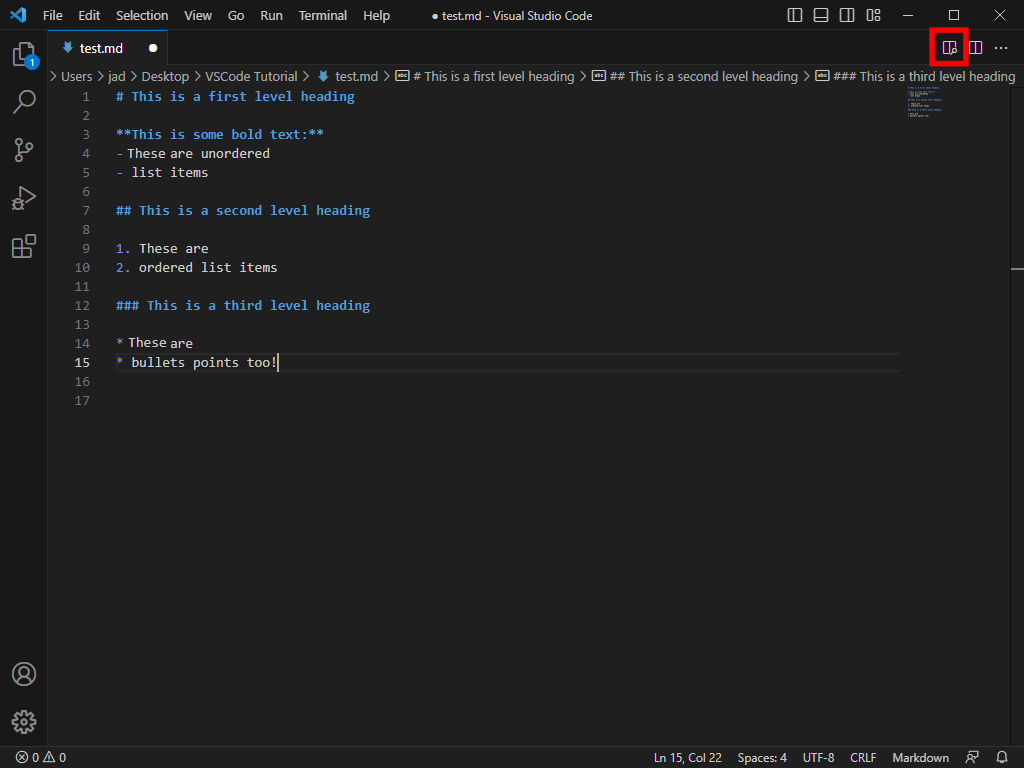
Once you have written the example document's content, you can also togge the live-preview option in VSCode, by clicking on the top-right symbol, which looks like a two-paged document with a magnifying glass:
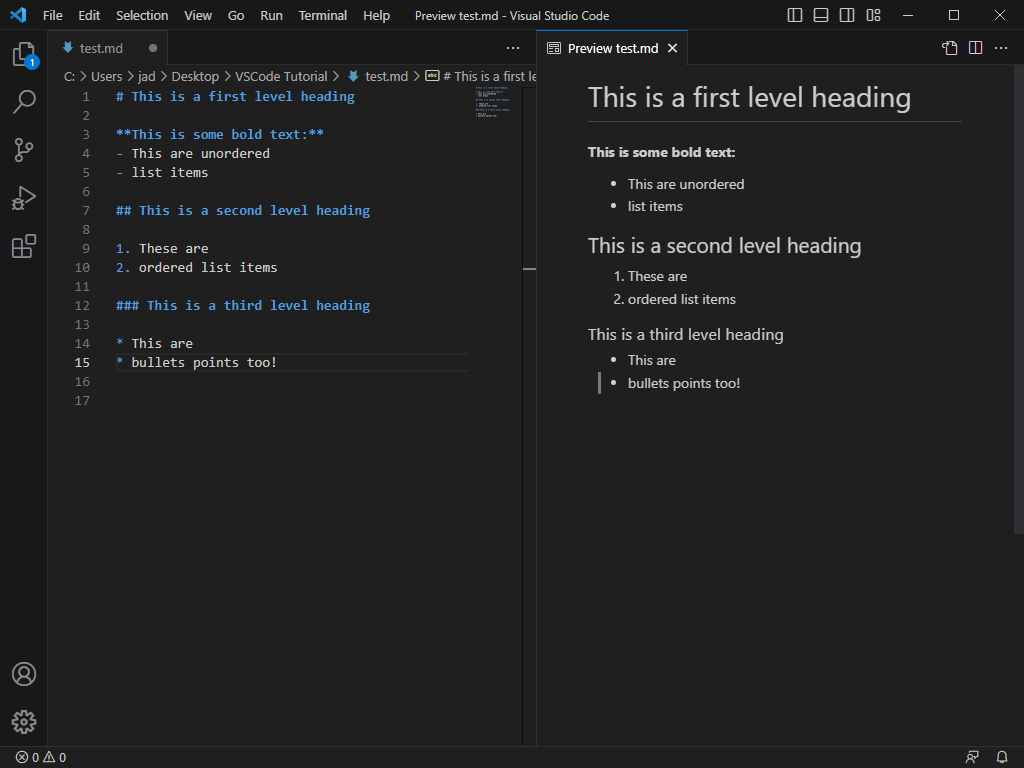
This gives you a good idea whether your syntax is correct when writing Markdown, and helps you visualize your document as you type it!
VSCode Snippets
Okay, time to leverage the power provided by VSCode, so we can take better (and faster) notes during meetings (i.e. create 'minutes'). VSCode has the capability to "map" specific character sequences (think of these like shortcuts) to text "snippets".
Snippets are just portions of text that we want to reuse in specific situations. VSCode's snippet engine enables us to insert these snippets very quickly, and also leverage some macro capabilities to make these 'snippets' a bit more interactive. This all results in users being able to insert "templates" of text on demand, which we will use to quickly record information while taking notes.
Use Case
The idea here is that you are typing notes, and want to QUICKLY record the time, who is speaking, and what this speaker said. This can be achieved by defining a 'snippet template' that within two or three key strokes will:
- Insert a timestamp
- Prompt you to type the speaker's name
- Drop you into an unordered list where you can take bullet point-based notes on what is being said.
Once the current speaker is done talking, and you are done recording his/her/their remarks, and another speaker starts responding, you can quickly insert another template and the cycle repeats itself, until the meeting is over.
By the time the meeting is done, and you are done recording what was said, you should have a comprehensive record (i.e. Minutes!) of the meeting, and you didn't even had to think about much, other than just recording the contents of the meeting!
Defining Markdown Snippets
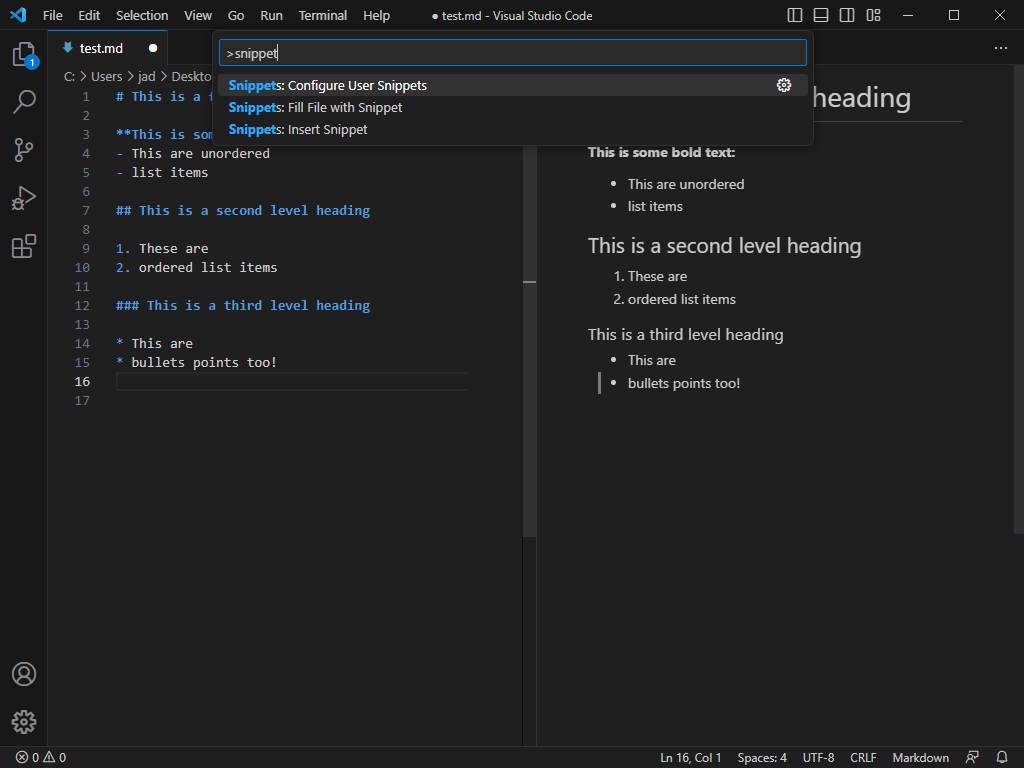
VSCode has a very convenient way of navigating files, projects, options, commands, and settings: the Command Palette! This is essentially a type of 'search bar' that is deployed on command, and let's you search for any command you want VSCode to execute.
To deploy the Command Palette, Windows and Linux users can use the Crtl+Shift+p keyboard shortcut, and MacOS users can conversely use the Cmd+Shift+p keyboard shortcut. You will notice a search bar deploy towards the top of your VSCode window.
There you can type 'snippet', and using either your mouse pointer, or the keyboard navigation arrows, select the option that reads: "Snippets: Configure User Snippets":
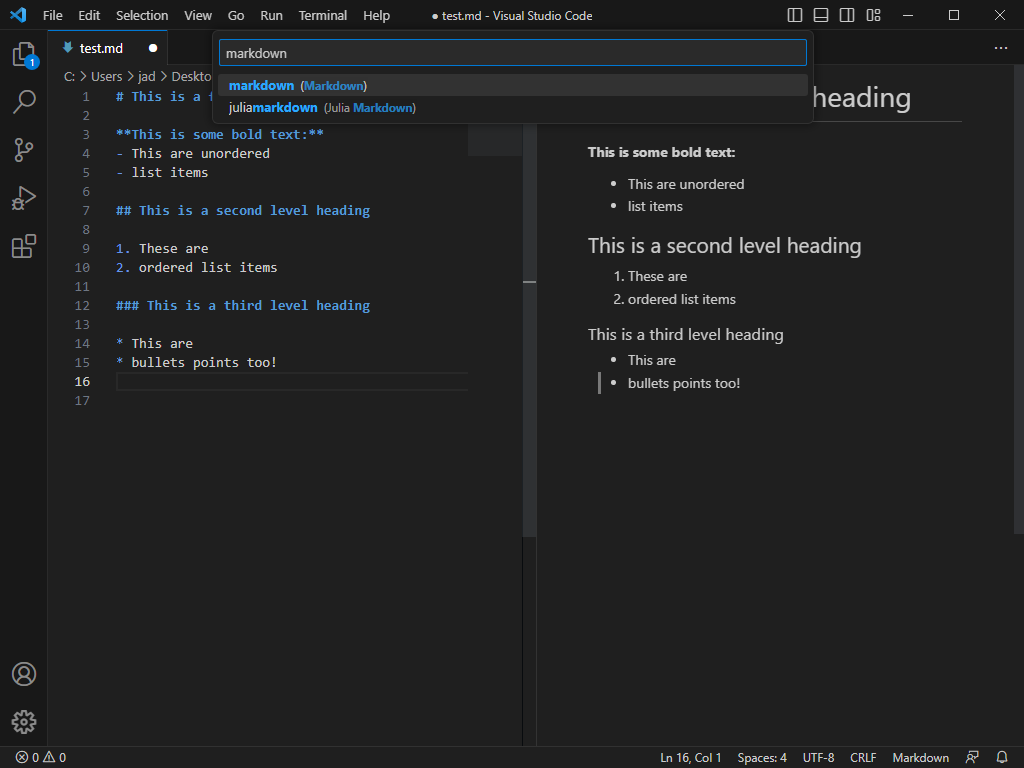
Once you select the 'Configure User Snippets' command, you will be prompted to select the type of snippet you would like to define. In this case we want to define a snippet for Markdown files, so you can type 'markdown' in the search prompt, and select markdown (Markdown) from the results:
Once you select the markdown option, you will be presented with a sample JSON file, where we will define our snippet:
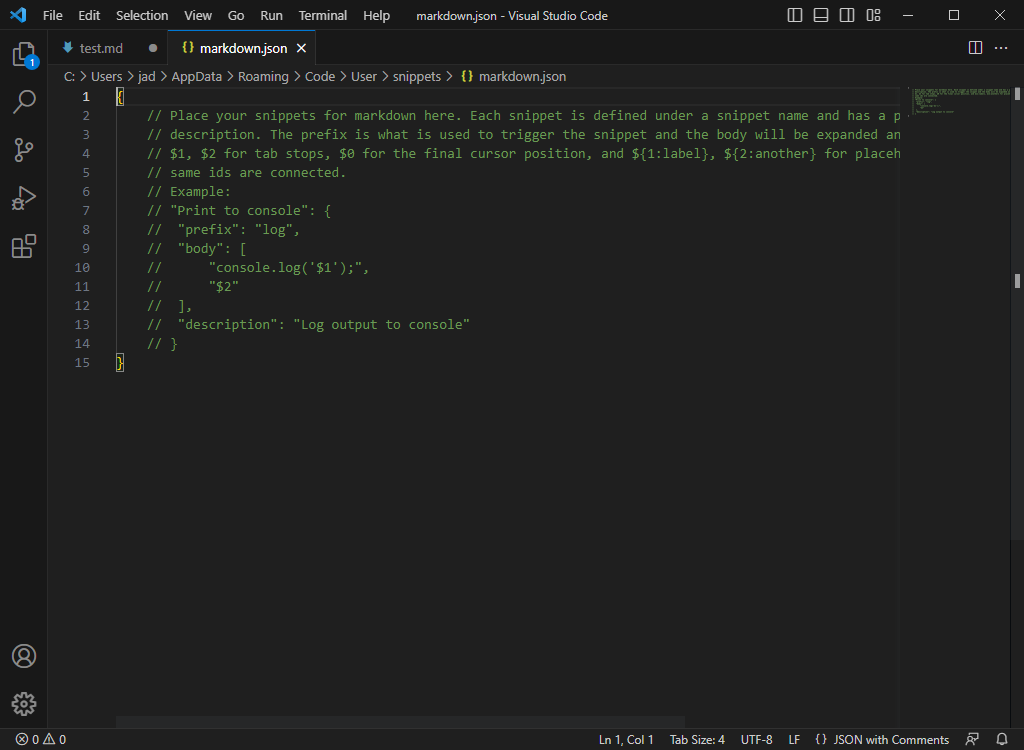
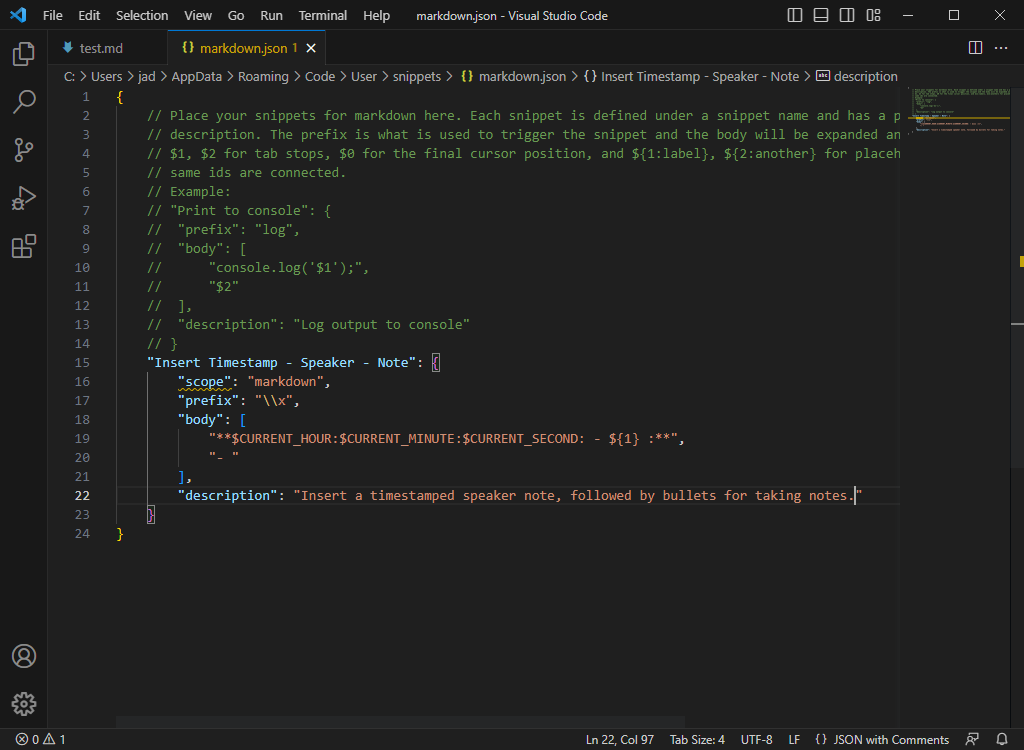
I will not go into details about this file, the snippet's logic, or JSON syntax, since it's beyond the scope of this tutorial. But the general idea here, is that you want to make sure your snippet file looks like this (feel free to copy/paste the following contents, overwriting the default file VSCode generated for you):
{
// Place your global snippets here. Each snippet is defined under a snippet name and has a scope, prefix, body and
// description. Add comma separated ids of the languages where the snippet is applicable in the scope field. If scope
// is left empty or omitted, the snippet gets applied to all languages. The prefix is what is
// used to trigger the snippet and the body will be expanded and inserted. Possible variables are:
// $1, $2 for tab stops, $0 for the final cursor position, and ${1:label}, ${2:another} for placeholders.
// Placeholders with the same ids are connected.
// Example:
// "Print to console": {
// "scope": "javascript,typescript",
// "prefix": "log",
// "body": [
// "console.log('$1');",
// "$2"
// ],
// "description": "Log output to console"
// }
"Insert Timestamp - Speaker - Note": {
"scope": "markdown",
"prefix": "\\x",
"body": [
"**$CURRENT_HOUR:$CURRENT_MINUTE:$CURRENT_SECOND: - ${1} :**",
"- "
],
"description": "Insert a timestamped speaker note, followed by bullets for taking notes."
}
}
A copy of this JSON file can be downloaded using this GoogleDrive link.
Once you have edited the contents of the snippet file, make sure to save the file. You can use the Crtl+s (Windows, Linux) or the Cmd+s (MacOS) keyboard shortcuts to save your file.
Note that this macro employs the sequence \x (a backslash immediately followed by the lowercase letter x) to prompt the insertion of our snippet into a Markdown file. This was chosen because in the US English keyboard layout (one of the most universal) the backslash (\) symbol is right above the <ENTER> key, which makes it convenient, and because this specific sequence of characters (\x) is unlikely to be encountered in everyday text one may write down.
If you would like to change this sequence, the place to do so would be the line:
"prefix": "\\x",
in the snippet file. For example, it you would like to replace the \ character for the forward-slash (/) character, you could make the following modification:
"prefix": "\/x",
Note also that in these configuration files, both the \ and the / characters are "escaped" (prefixed) by a single backslash (\) character, yielding \\ and \/ respectively. This is for technical reasons beyond the scope of this tutorial. However, I must mention that if you would like to use a different sequence of characters to insert the snippet (other than \ or /), you may or may not need to use an "escape" sequence for specific characters.
Using Snippet to Take Notes
Now that we have VSCode installed, the Markdown extension set up, and our note-taking snippet in place, we can now use VSCode to take very quick and organized notes about what speakers are saying in the meeting. Once another speaker takes the floor, we will be ready to record a timestamp of when they spoke, who spoke, and notes about what they said!
Going back to our example Markdown file, we can now insert the characters \x at the beginning of a new line, and you will see how VSCode suggests the snippet we just defined, by showing you a small pop-up dialog:
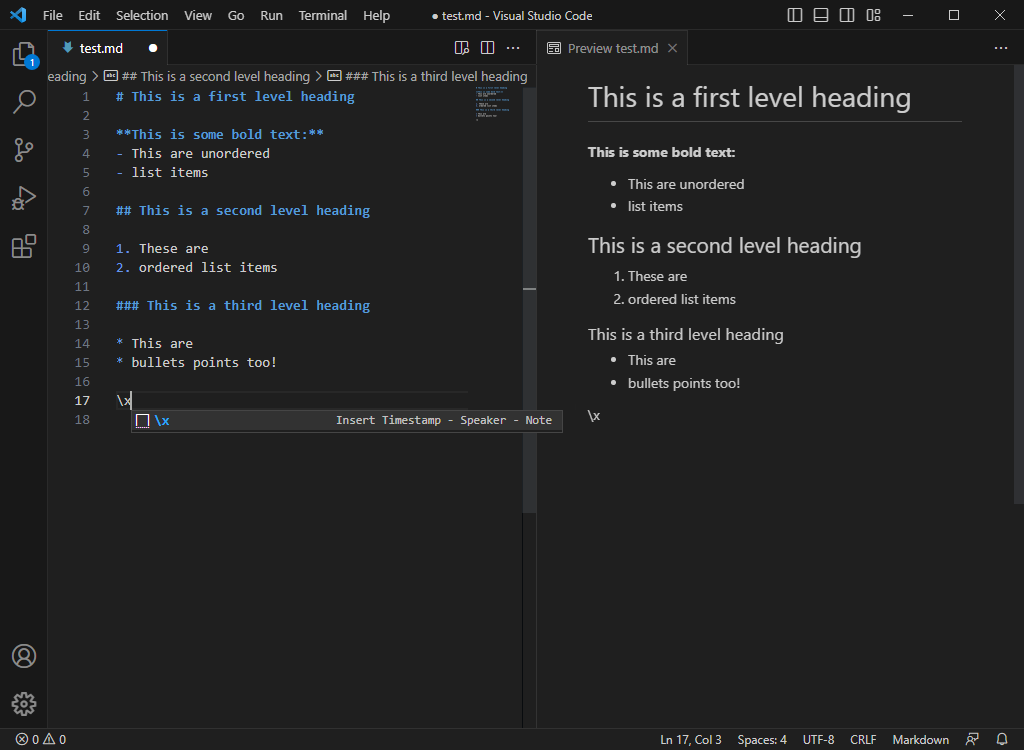
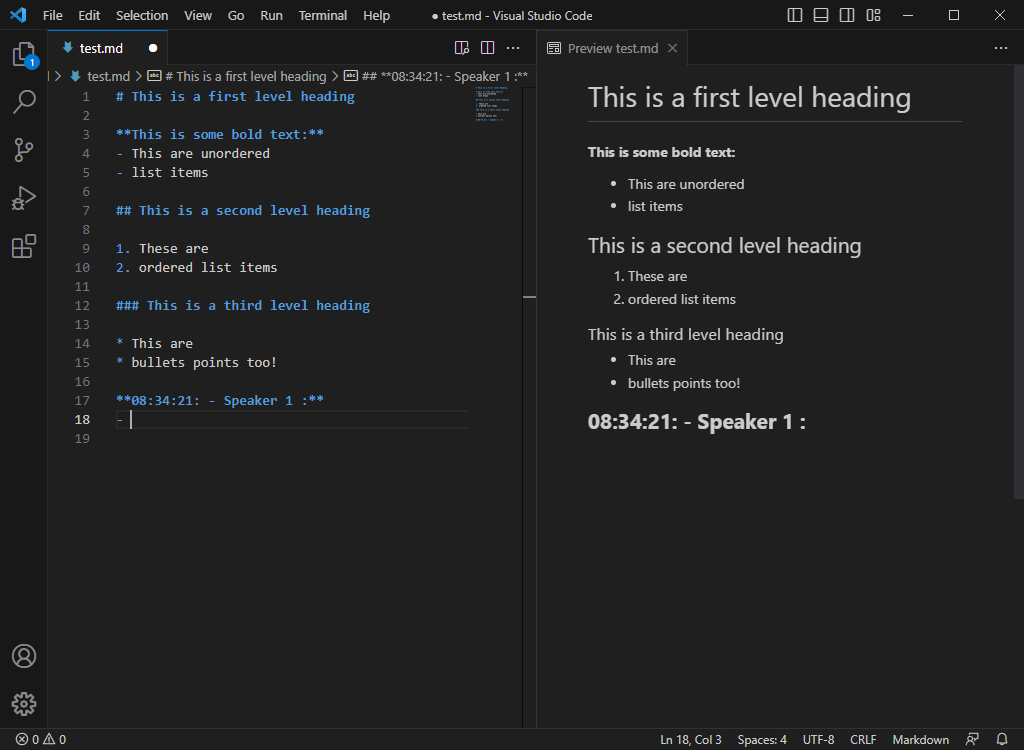
At this point, we can either press <ENTER> or <TAB> to auto-complete and insert our snippet! (you can cancel this action, by pressing <ESCAPE>). Once the snippet is inserted, note that the cursor has been moved automatically to the position where you can record the speaker's name!

Once you have input the speaker's name, you can press the <TAB> key, and the cursor will move directly to the first bullet point under the timestamped block we just inserted:
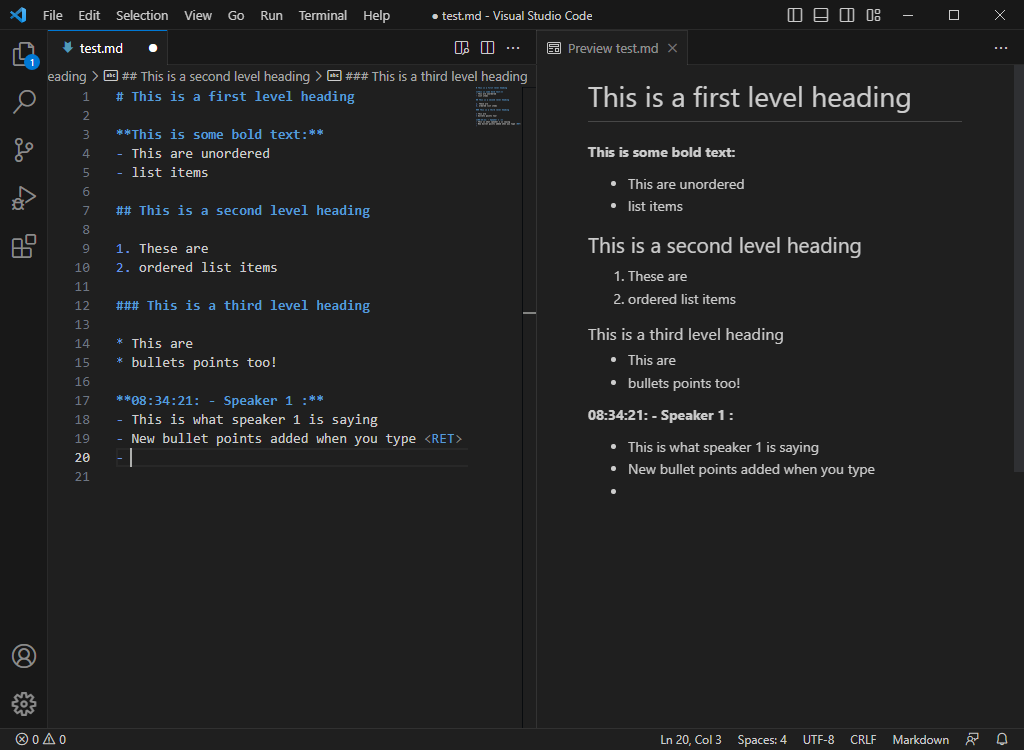
Also note that while inserting bullet points into the document, if you press the <ENTER> key, you will be automatically prompted to insert a new bullet point right below the previous one! If you press <ENTER> once again on an empty bullet point, you will be dropped out of the unordered list block.
Once you are dropped out of the bullet points block, you can invoke the \x snippet macro again, and record notes for a new speaker!
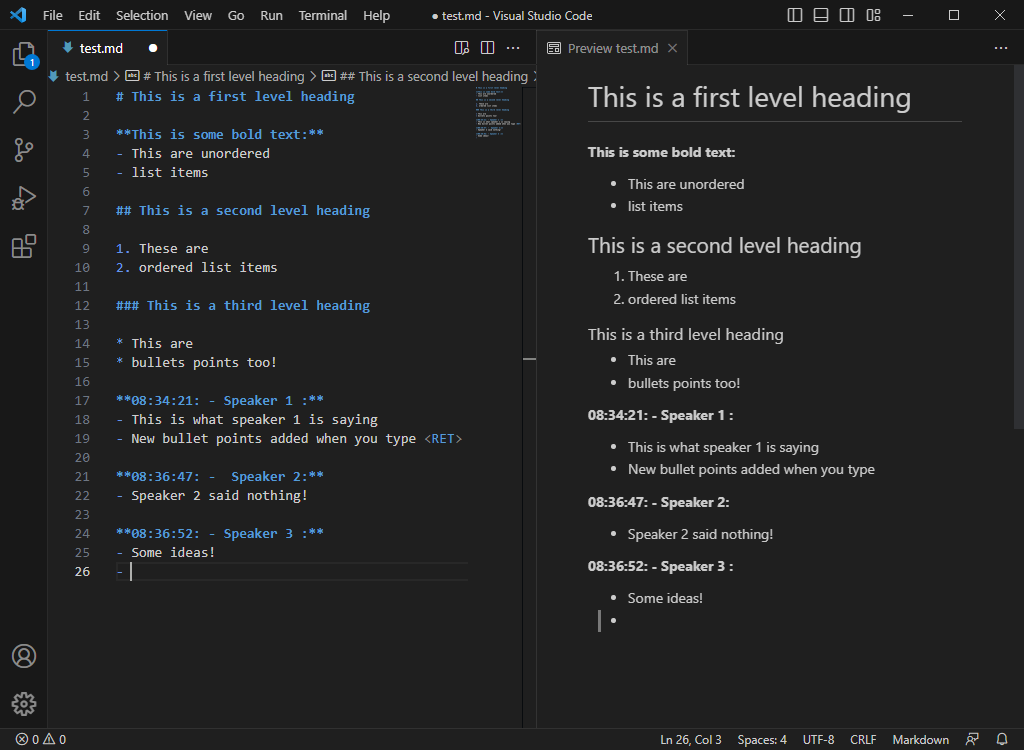
And this way, we can now take very quick notes from meetings, that will be easy to share, combine, and work with when we consolidate multiple meeting notes, from multiple people.
I hope you learned something new, and that this small tool helps you take better and more efficient notes during the conference!
Usage Video
In this GoogleDrive link you will be able to see a short video showing how VSCode is used with the Markdown snippet to take speaker notes.
File Templates
Through the following GoogleDrive links you will be able to download some Markdown and OpenDocumentFormat (Word) templates for note taking: